


Faux Plaster Painting for Pots
- Angela Kuchenbecker
- Apr 11
- 3 min read

Updated: Apr 19

Hey there, DIY enthusiasts! If you’ve got some old pots lying around—terra cotta, clay, or even plastic—why not give them a fabulous makeover with faux plaster paint? This trendy technique is all about turning your pots into charming little pieces of art that scream rustic elegance. Perfect for sprucing up your indoor and outdoor spaces!

This site contains product affiliate links. We may receive a commission if you make a purchase after clicking on one of these links. As an Amazon Associate, I earn from qualifying purchases. For more info, click here.

Picking Your Pots
First things first, let’s talk pots! When choosing which ones to revamp, think about the material and their current condition. Terra cotta pots are super porous, meaning they soak up moisture and look fantastic with a faux plaster finish. Clay pots are tough and classic, while lightweight plastic pots can totally join the party too!

Picking Your Paint
Now comes the fun part—choosing your faux plaster paint! There are tons of textures and colors to play with, so think about what vibe you’re going for. Do you want a smooth, polished look or something a bit more rustic and textured? Some paints even mimic the look of traditional plaster with a lovely matte finish. Earthy tones, soft whites, and muted pastels are great picks to channel that old-world charm.
I love to use chalk paint as it can go over any surface and gives a nice matte finish. My favorite brand is FolkArt.
Add Texture
Start with a ratio of one part baking soda to three parts paint for a subtle texture. The mixture will thicken and become slightly grainy, allowing for more pronounced brush strokes.

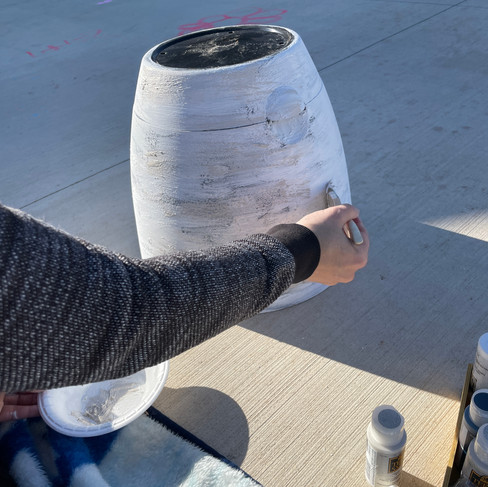
Get Your Paint On!
Time to apply that faux plaster paint! Depending on the look you want, you can use a sponge, mini trowel or brush for some cool textures. Start with a base coat and let it dry per the instructions (don’t rush this part!). Once it’s dry, get creative with additional layers to build up that texture. Techniques like sponging or stippling can add some unique flair that’ll make your pots look like they’ve been around for ages.


Enhancing the Texture
After the paint dries, use a dry brushing technique with a contrasting color to highlight the texture and add dimension.

Want to Add More?
Use a stencil to apply a heavier coat of plaster for an awesome raised look.
Seal the Deal
After you’ve achieved your desired texture, it’s sealing time! If your pots are going outdoors, a clear matte or satin sealant will protect your art from the elements. This not only keeps your faux plaster finish looking fresh but also shields it from moisture and UV rays. Plus, it gives your pots that extra pop!

Style It Up!
With your pots all dressed up and sealed, it’s time to style them! Grouping a bunch of faux plaster pots together can create a stunning focal point, whether it’s on your patio, balcony, or inside your cozy home. Fill them with colorful flowers, lush greenery, or even your favorite herbs to bring some life and color into your space. The old-world vibe of faux plaster blends beautifully with styles ranging from rustic farmhouse to Mediterranean chic!


Wrap It Up!
So there you have it! Revamping old terra cotta, clay, or plastic pots with faux plaster paint is not just a fun project—it’s a chance to express your creativity and bring a touch of charm into your home. With a little prep, the right materials, and some artistic flair, you can create unique pieces that reflect your personal style.


Comments